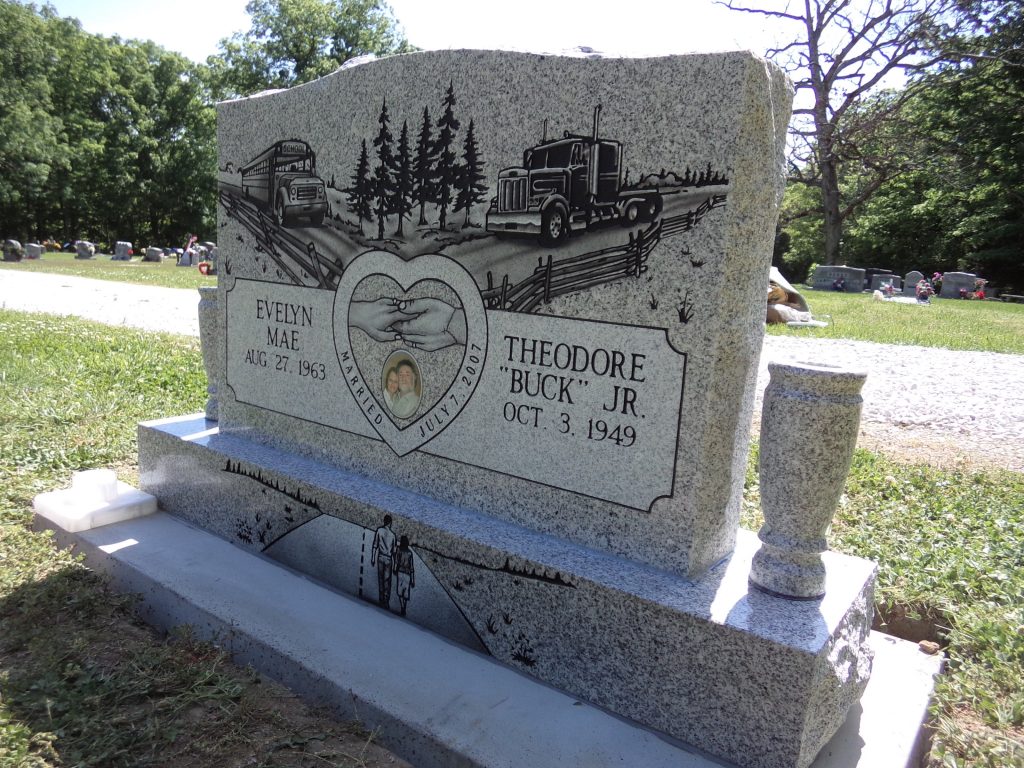
Over the years we have sometimes been hired by others to install, or, reinstall headstones and monuments sold by others, or, to redo a crappy installation originally performed by others. Below is a sample of one we installed a couple years ago for a family who had purchased their headstone from an outfit in California. PLEASE NOTE: We did not produce this stone – the purpose of this article is to illustrate best practices when installing a monument.
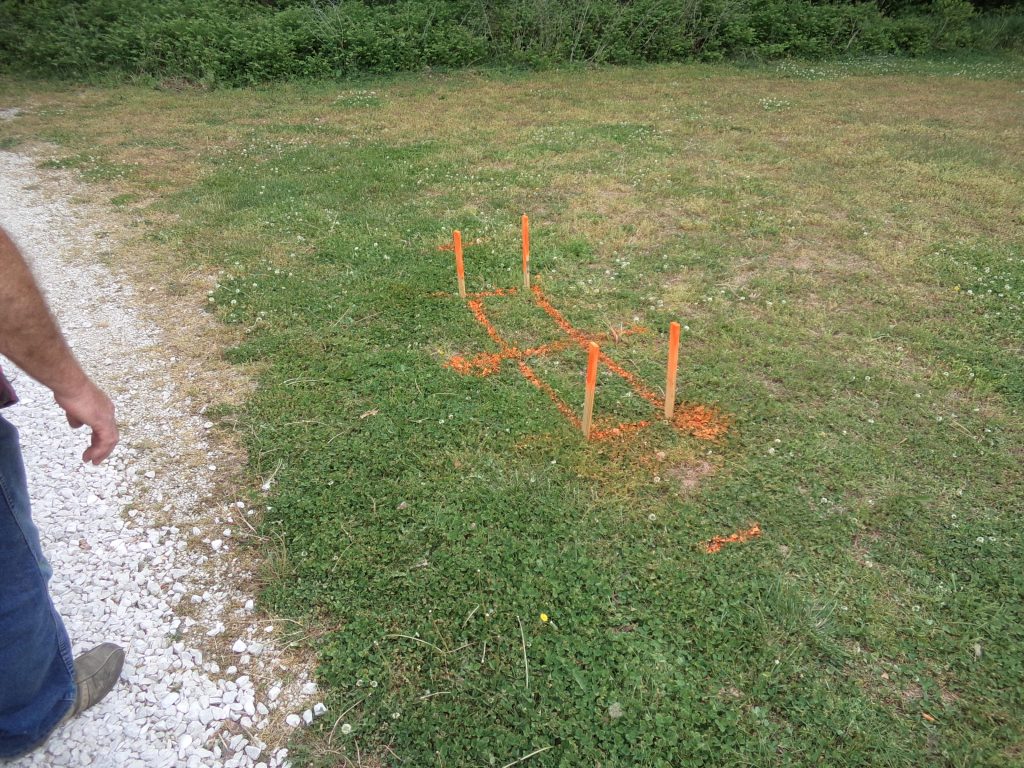
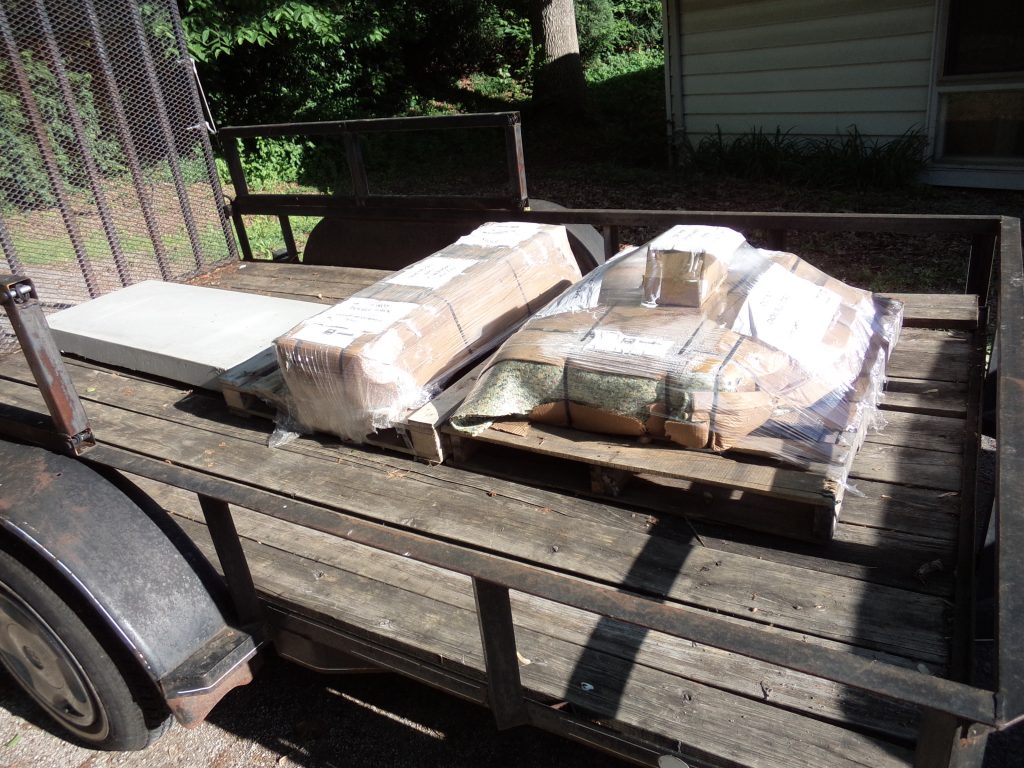
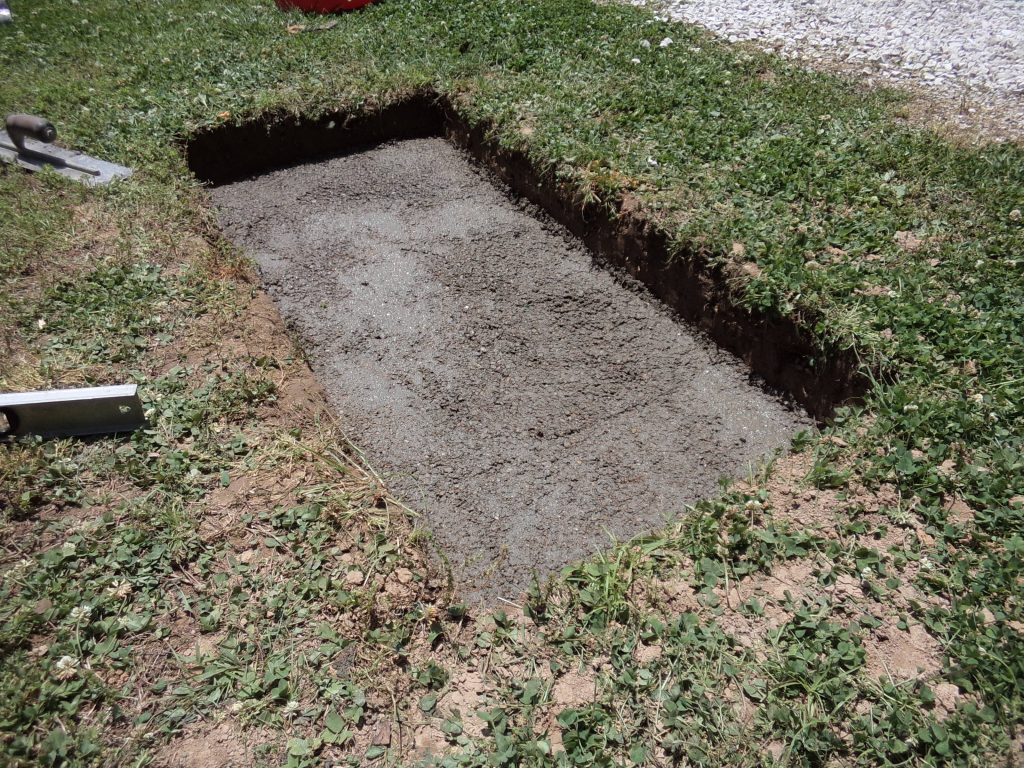
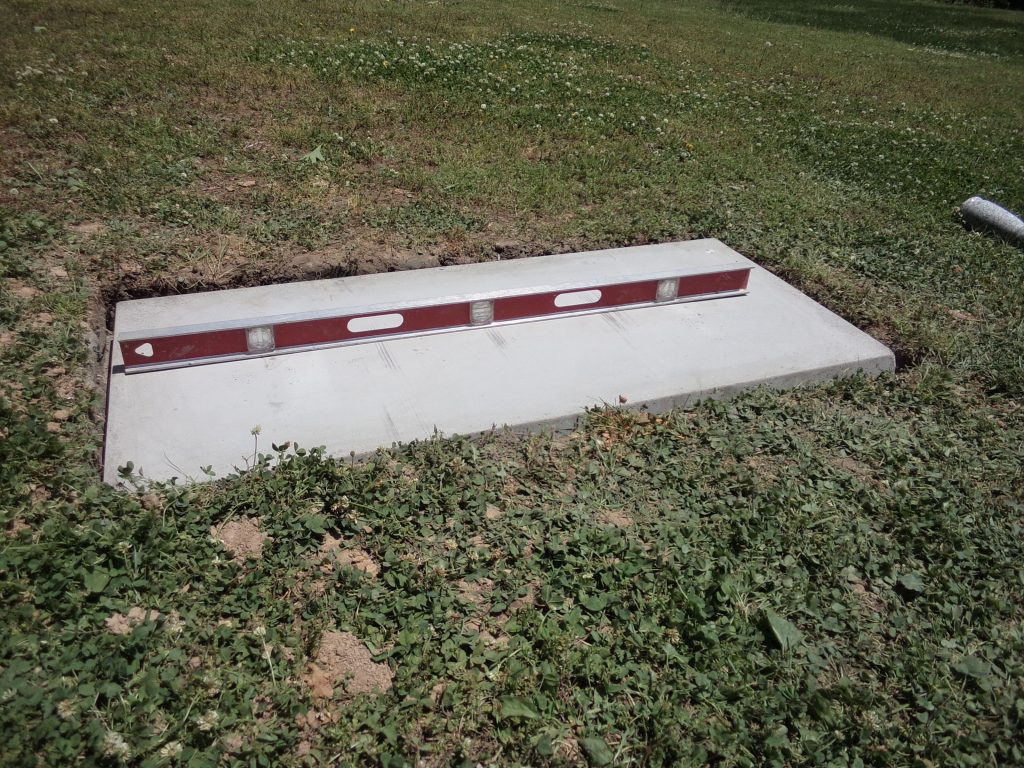
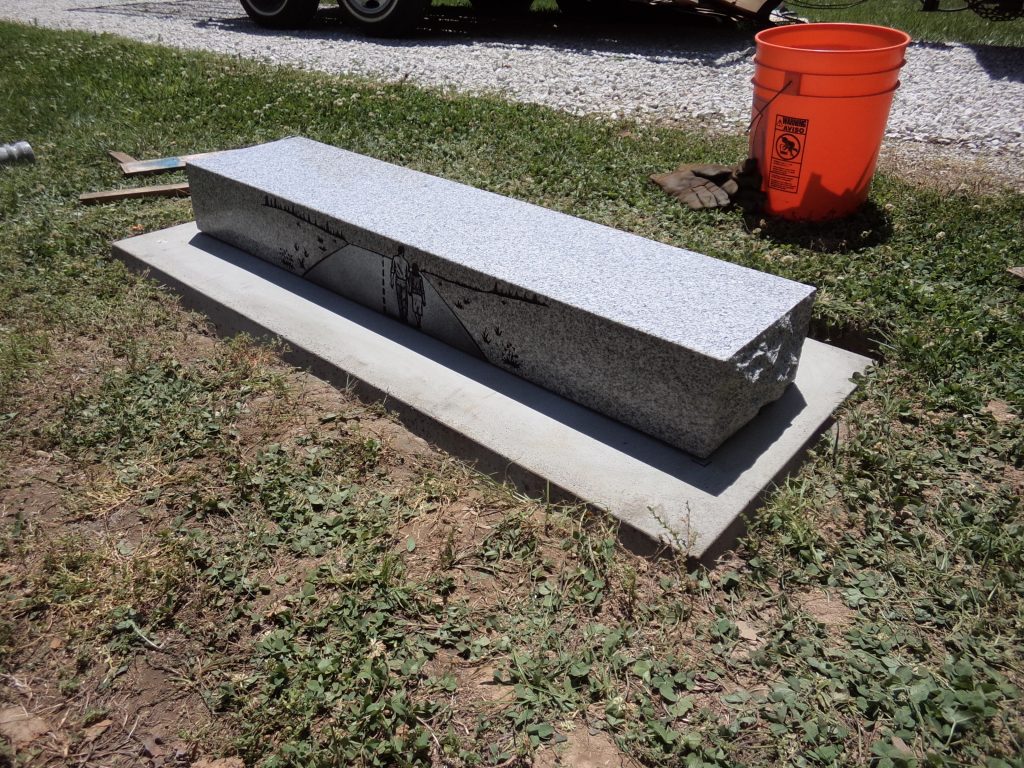
First, it is necessary to be sure it is installed in the correct location. This installation was in a small rural cemetery outside a town some miles away. The location was carefully marked and staked out and the centerline/midpoint marked.Everything had to be hauled to the site. The “pad” in the back shown in the picture above was poured in a vault factory which gives a very smooth, uniform surface for placing the monument.Above, we have cut the foundation and dug post holes to below freeze level. The thickness of the poured concrete and the pad together is around 10″ and the depth of the holes is 2′ minimum.Here the concrete has been mixed and poured. We do not use “soupy” (real runny) concrete, even though it is easier, since a runny mix is not as strong as a stiff mix when it sets up.Here we are checking for level – very important so that the finished monument will stay permanently upright.In the above photo, we have flipped the pre-formed reinforced concrete pad onto the wet concrete. The two will bond together as the concrete hardens. As you can see, we are again confirming everything has remained level.Here, the base has been installed and centered on the pre-cast, reinforced pad. Not shown is the special stone bonding tape holding it in place.This is a closeup of the application of the bonding taped between the upright (called tablet, or, die) and the base. The upright is resting temporarily on wood blocks before it is lowered onto the base. The bonding tape is kept from being squeezed out by the pennies – we use pennies for traditional reasons (the dead, passing over the river Styx into Hades, in Greek mythology, use pennies to pay the boatman). Most people use simple shims which perform the same function.Here, the completed monument has been installed. PLEASE NOTE: We did not produce this stone, merely installed it for the family. The stone is not of the highest quality, although the design is interesting. In case you can’t guess, the lady is a school bus driver, and, he is a truck driver. This installation will last for a very long time, will not tip or lean nor come apart. It was installed in a quality, professional manner.